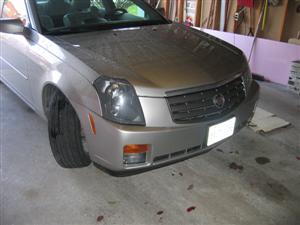
CTS and CTS-V Front Bumper Removal and headlight access Instructions
Thanks to Jon04cts0v
Click the images to make them larger
Park the car with the wheels facing all the way to one way. Make sure to leave plenty of room in front and on the sides.
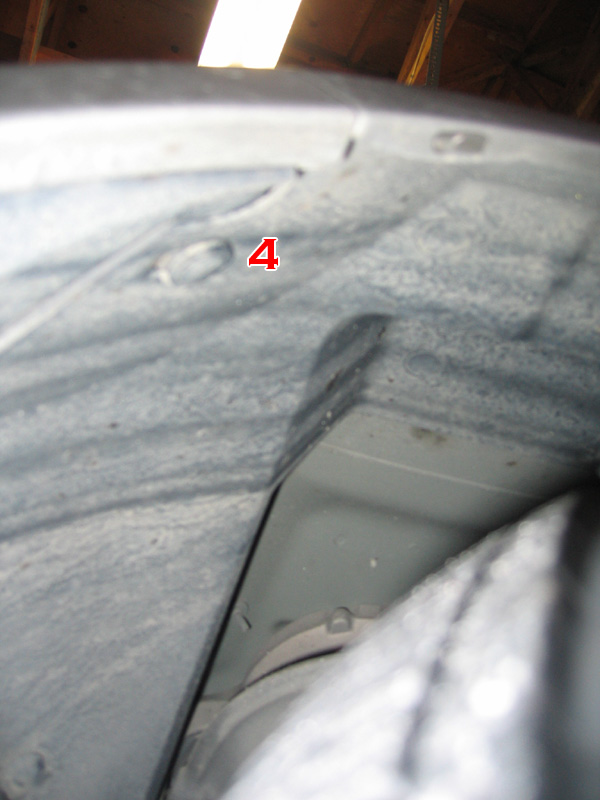
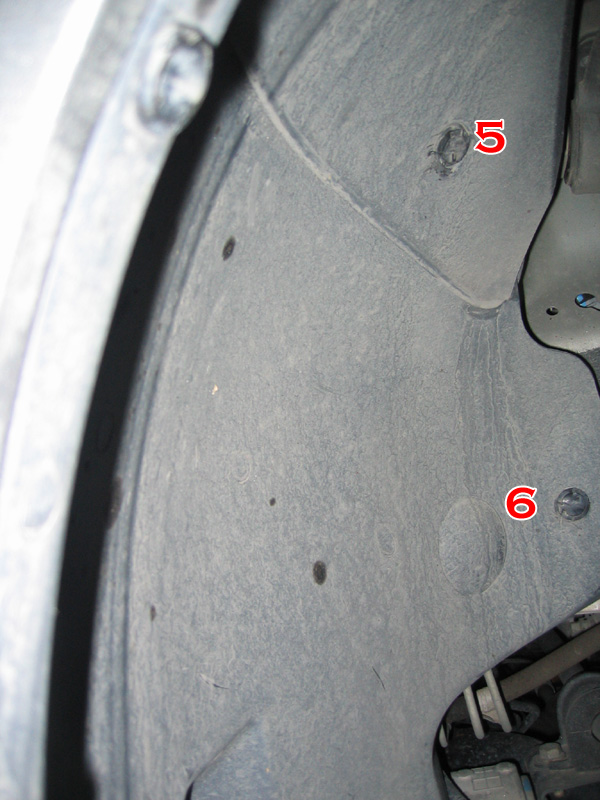
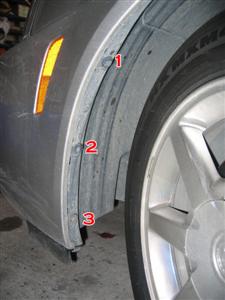
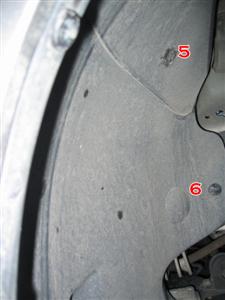
 There are a bunch of pins that need to be removed (see pictures below). I suggest doing it in the following way: Turn the wheels all the way to the right. Remove #s 1, 2, and 3 on the left side. Then go to the right side and remove pins # 4, 5, and 6. #4 is actually at the top. Now turn the wheel all the way to the left, and remove #s 1, 2, and 3 on the right side, and #s 4, 5, and 6 on the left.
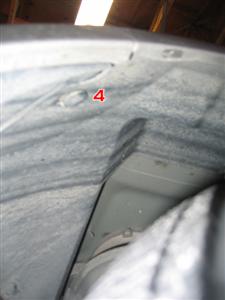
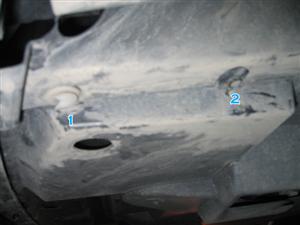
 Next, there are a bunch of pins underneath the car that need to be removed. On the bottom of each side, there are 3 pins. #3 is not shown, but is in the very corner. After these three are removed, the plastic panel/lining inside the wheel well can be removed.
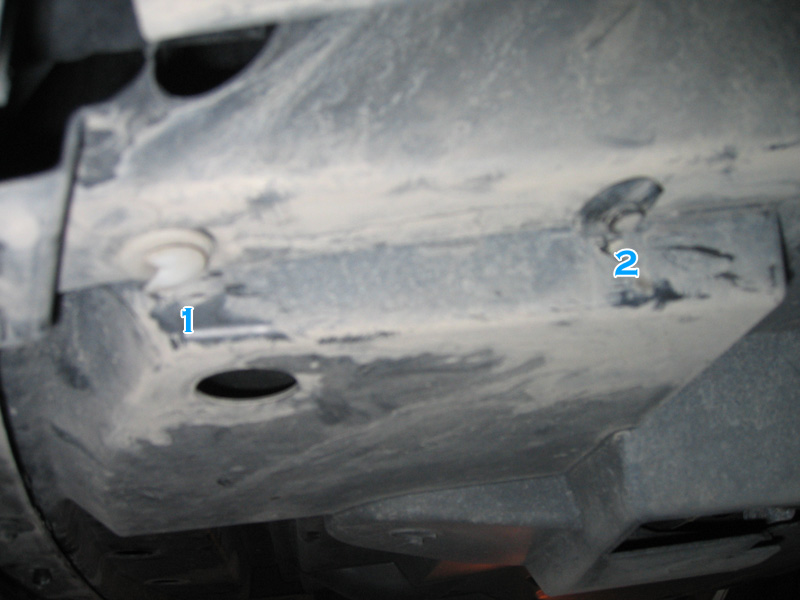
 Remove the 6 pins along the front of the bumper. They are underneath the car, and go through the black rubber skirt. There will be two pins facing the wrong way, ignore them, as they only hold the skirt to the bumper. (Sorry, no pictures.)
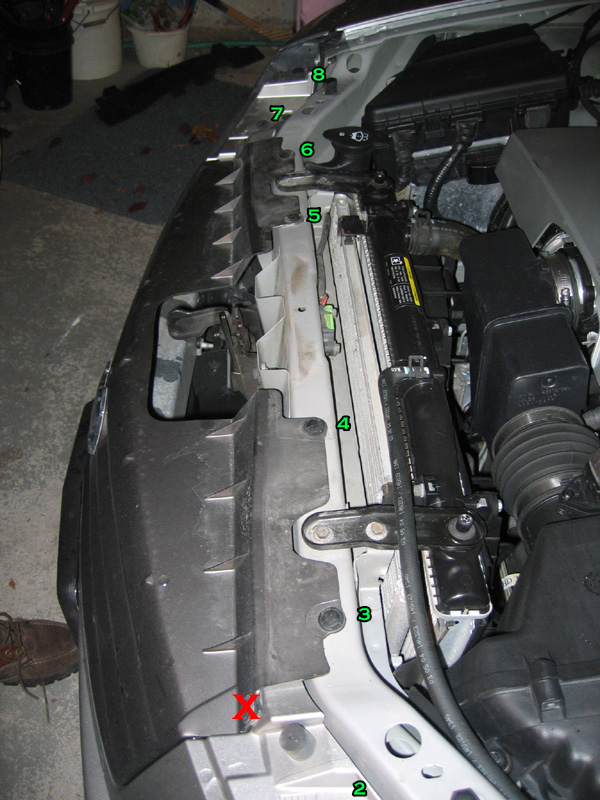
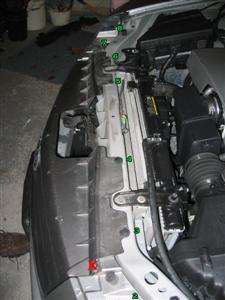
Next, pop the hood and remove the rubber piece shield on top of the grill. There is nothing holding it in place, so it just comes out easily. Underneath, there will be 8 pins. Number one is not shown in the picture, and the pins facing forward do not need to be removed. (See red X).
Remove the 6 pins along the front of the bumper. They are underneath the car, and go through the black rubber skirt. There will be two pins facing the wrong way, ignore them, as they only hold the skirt to the bumper. (Sorry, no pictures.)
Next, pop the hood and remove the rubber piece shield on top of the grill. There is nothing holding it in place, so it just comes out easily. Underneath, there will be 8 pins. Number one is not shown in the picture, and the pins facing forward do not need to be removed. (See red X).
 Unplug the wiring to the spot lights/DRLs and side turn signals.
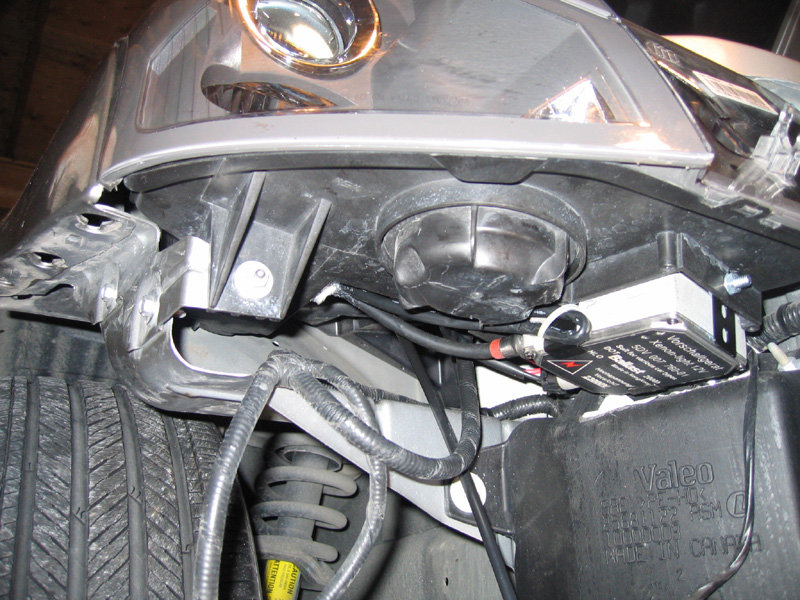
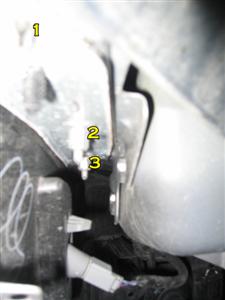
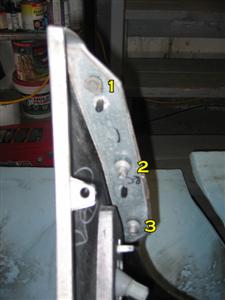
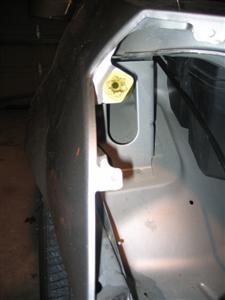
Now go back to the bumper and look forward towards the turn signal on the inside. Slightly above, there are 2 bolts and a nut. Remove # 1 (the nut) completely, and loosen bolts #2 and 3. Hammer the studs/bolts # 2 and 3 upwards. These are keyhole locks which hold the bumper up after the screws have been removed. (See third picture below.) Repeat for other side.
Unplug the wiring to the spot lights/DRLs and side turn signals.
Now go back to the bumper and look forward towards the turn signal on the inside. Slightly above, there are 2 bolts and a nut. Remove # 1 (the nut) completely, and loosen bolts #2 and 3. Hammer the studs/bolts # 2 and 3 upwards. These are keyhole locks which hold the bumper up after the screws have been removed. (See third picture below.) Repeat for other side.
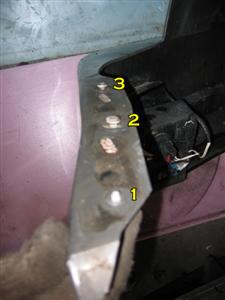
 View from above showing heads of the studs (#2 and 3) which go into the keyholes shown in next picture.
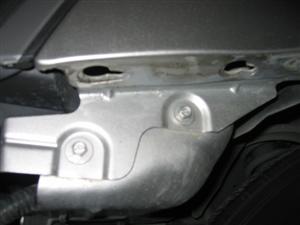 Slide the whole bumper forward so the heads of the studs go through the keyhole which will allow the bumper to drop. Be careful not to twist the bumper, as it is very floppy, and the paint can crack easily.
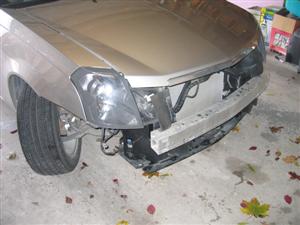
Your bumper is now off. Drive around the block a couple times, since this looks kinda cool. The tutorial ends here. =P Joking. =)
Slide the whole bumper forward so the heads of the studs go through the keyhole which will allow the bumper to drop. Be careful not to twist the bumper, as it is very floppy, and the paint can crack easily.
Your bumper is now off. Drive around the block a couple times, since this looks kinda cool. The tutorial ends here. =P Joking. =)
To get to the headlights:
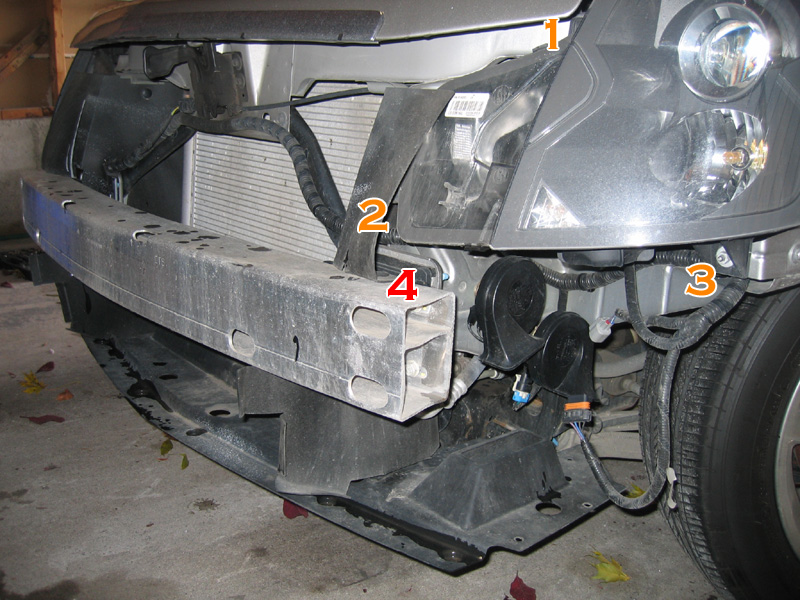
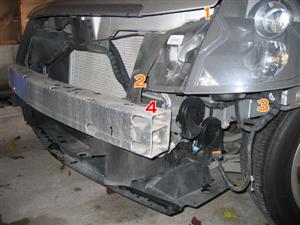
There are three screws and a ball socket holding the headlight in place. The three screws are labelled # 1, 2 and 3. To get to screw # 2, you need to move the rubber flap blocking the way. To do this, remove # 4 which is a plastic pin similar to those that were removed earlier.
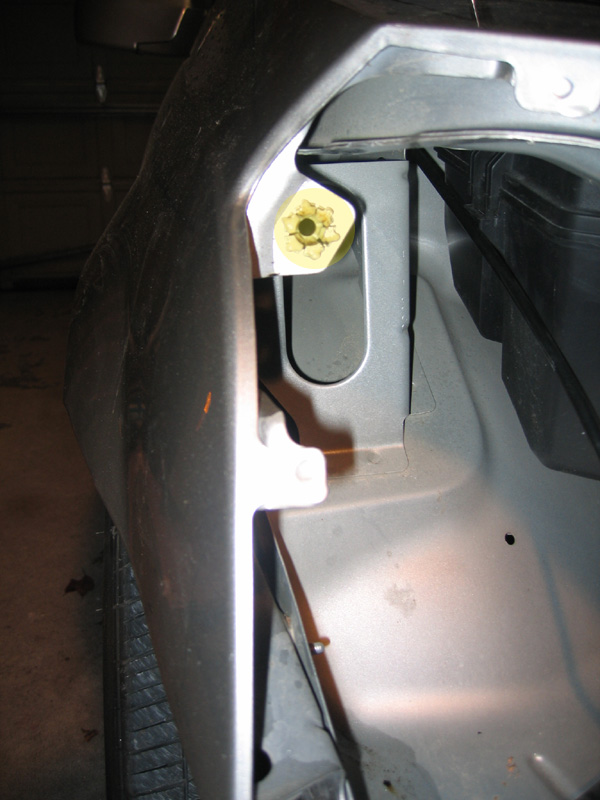
 After the three screws are removed, the headlight is being held in place by a ball socket. The headlight should just come off if you pull forward. However, if your headlight seems to be cemented in place like mine, try the following. Pull forward slightly, and spray WD-40 or some other lubricant onto the ball socket. Then slide a big flathead screwdriver between the ball and socket, turn the screwdriver, and pull on the headlight. The headlight should come off now.

To reassemble your car, reverse all your steps.
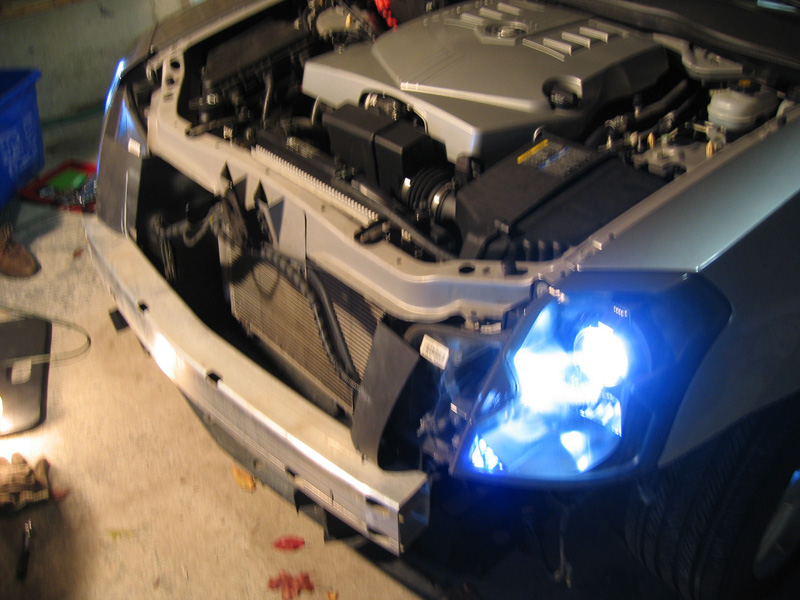
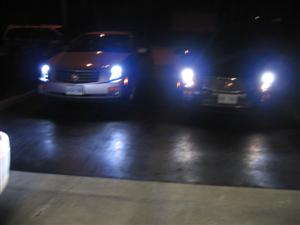
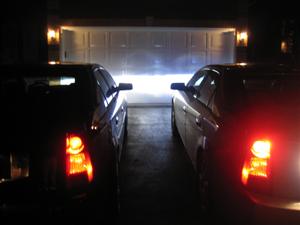
If you are installing a HID kit, here are some pictures of mine.


THANKS VERY MUCH TO JON04CTSV:
|