Adding a complete audio system using JL Audio Cleansweep
Thanks to FlyFlip420
Click the images to make them larger
1. Items Required/Equipment:
JL Audio Cleansweep,
Inifinity Reference 4 Ch amp,
Inifinity Reference 5 Ľ” component speakers,
5 1/4 “ Coaxial Speakers,
JL Audio 500watt Monoblock amp,
JL Audio 12w6v2 sub,
25-30 ft of 4guage car stereo power wire,
10 feet of 4 guage ground wire,
25-30’ of 16 guage speaker wire,
One 40-60 amp car fuse holder and fuse, one 4 guage battery terminal,
One 4 guage distribution block and fuses,
2- 4 guage eyehooks,
20 feet of 18-24 guage remote turn on wire(any electrical wire should do),
3- 6ft rca cables.
Remember this is car audio and you will probably go to your stereo shop a couple times because you will never have what you need
Schematics
CTS Bose Schematic (PDF)
CTS NON Bose Schematic (PDF)
3 way front Summing (PDF)
Woofer Summing (PDF)
Procedure
I know this isn’t the best, and I didn’t want to take everything apart again to take the pics, but if you have any questions at all don’t hesitate to ask!!
Wiring for POWER
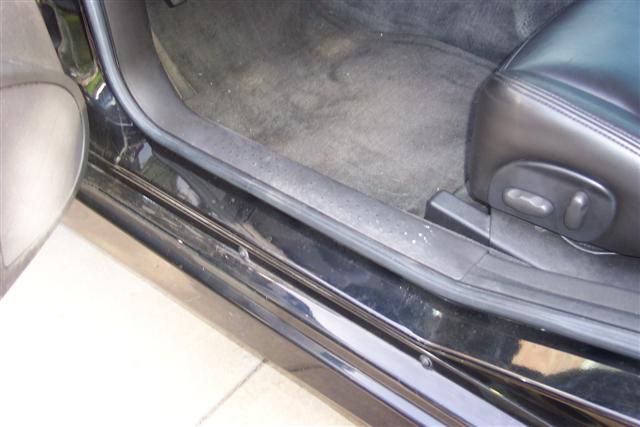
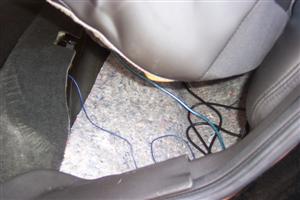
First take the side floor moldings off with a screwdriver on the drivers side front and rear and run the 4 guage power wire in the carpet between the car and the carpet.

Run the wire inbetween the drivers seat and the center pillar.
Remove the rear seat by pushing in at the bottom and pulling up.
In the trunk, remove the black circular net attachments,pull the drivers side trunk molding out. These remove by unscrewing them there are numerous ones in the trunk…
Then you will need to remove the plastic rear trunk piece to remove or slide the drivers side carpet away from the side of the car
Remove the rear seat back by removing the bolts on the inside of the trunk , and at the bottom of the seat.
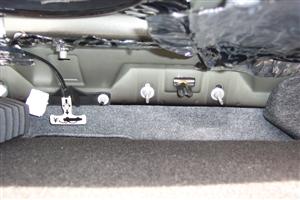
There are 4 bolts inside the trunk…You will then be able to pass the power wire through to the trunk.
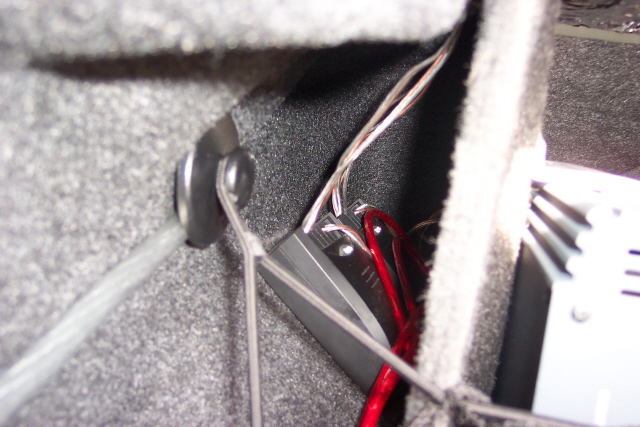
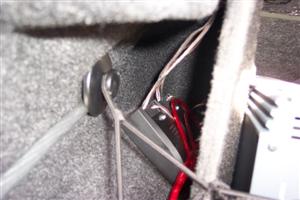
By the brake pedal, you will see a rubber grommet, puncture the grommet with a screwdriver to open it up wider and push the 4 guage power wire through(might take 2 people) be sure to seal the hole with some gasket seal…
 Snake the wire along the inside of the car close to the interior wall, passed the engine, and over to the battery. DO NOT CONNECT!!
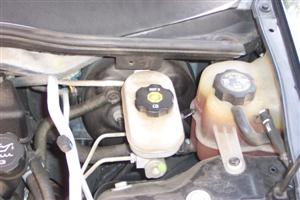
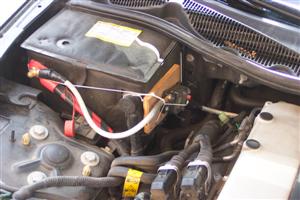
Attach the 4 guage battery terminal to the wire and simulate it on the battery to make sure you have enough wire and its secure in the engine compartment…
Then figure out where you want the 40-60 amp fuse holder to be mounted,
Mount the fuse holder and DO NOT put in the fuse, In the above picture you can see I have mine mounted on a piece of woor and currently tied to the battery… this is a circuit breaker not a fuse holder and you may use a sealed fuse holder instead…
Simulate the same connection to the battery and to the fuse holder and cut the wire and attach it to one end of the fuse holder, with no fuse in it, you may now attach the other end(that goes into the car) to the fuseholder.
Again with no fuse in the car, you may now attach the battery terminal to the battery.
You should now have a connection from the battery to the 4 guage power wire to the fuse holder to NO FUSE to the rest of the 4 guage power wire that runs into the car, under the carpet and into the trunk.
Mount the distribution block and connect the four guage wire to it.
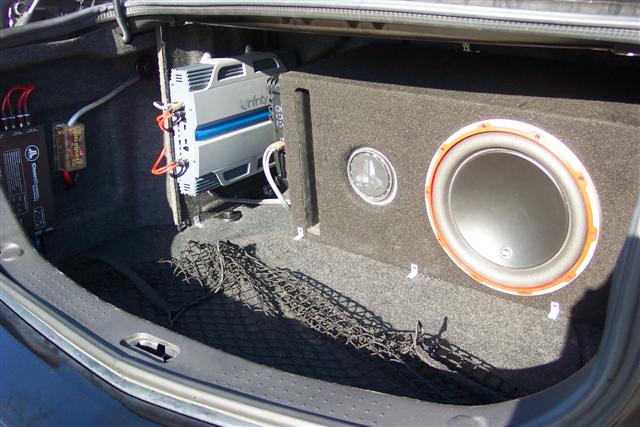
Mount your amps(maybe under the rear deck?) I have mine mounted on a carpet piece of wood, and one on the sub box.

After they are mounted, connect the distribution block to the amp with another strip of 4 guage power wiremeasured to fit the distance. Then do the same for the other amp. DO NOT PUT THE FUSES INTO THE DISTRIBUTION BLOCK!!
Now you should have a power wire connection from the battery to the trunk and to the amps…with NO FUSES inplace….
Wiring the remote turn on
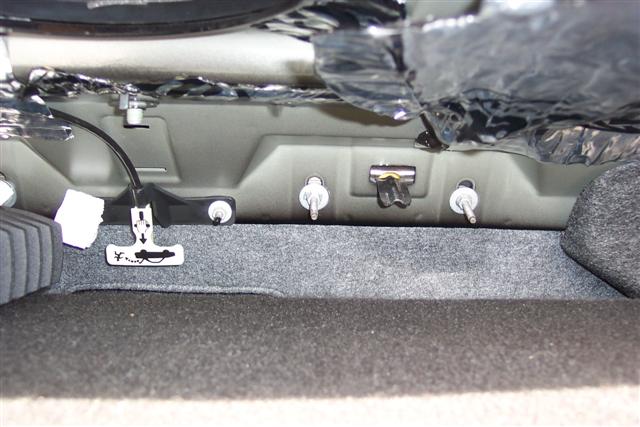
Next take The driver side fuse panel under the rear seat(which is removed) and connect the Remote turn on wire to the fuse marked CCP(climate control) This will turn your amps on and off with the ignition.

Now all remote turn ons should be connected(2amps, and cleansweep)
Wiring the ground wire-Using one of the bolts that holds the rear seat on, attach 2-4 guage ground wires with eyehooks on them to the bolt and bolt the seat back on. When you squeeze the eyehooks onto the ground wire, attach the groundwire for the Cleansweep to one of the terminals so that three things (2amps and cleansweep) are gounded to one bolt. You may need to have a washer between to make a solid connection…
At this point, you should have a connection for power to all source, remote turnon for all sources, and all sources should be grounded...
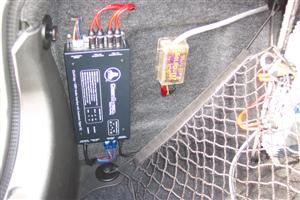
Cleansweep
Hook up the outputs of the Cleansweep(rca plugs) to the 4 channel amp….then from the rca output of the amp, connect using rca cables again to the sub amp inputs…
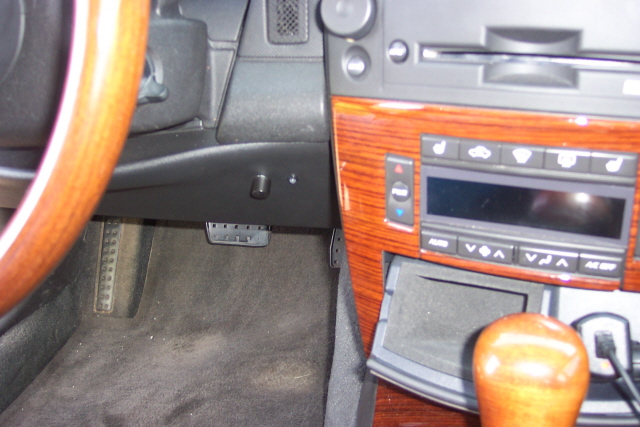
The cleansweep comes with a volume knob that I have mounted by climate control, under the steering wheel.

You can mount your where you feel comfortable…You will probably want to run the wire either in the carpet with the power wire, or under the carpet and through the center console. I ran mine by the power wire and up by the steering column…


For the aux input...
you will attach a set of RCA to the cleensweep input and run the wire into the back seat. I ran this wire under the carpet with a snake, a hammer and a screwdriver. Will take 2 people for sure!! The carpet is tight and you will want to lift up the center console.
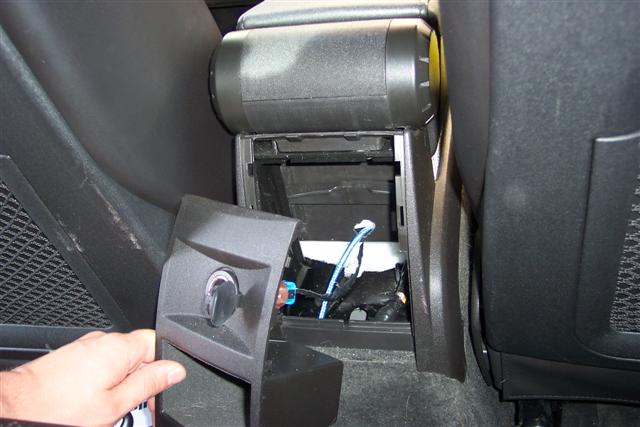
Take out the ashtry, and remove the bolt….there are two more bolts under the circular covers on the side of the console, remove these as well. This will allow you to lift up the console, place something under it so it stays propped up for you.
Then start to feed the snake under the carpet and try to get it to the console….this will take some time to loosen up the carpet with the hammer as a pry, not to hard, but you will eventually get it to go through,
Then pull the rca through…
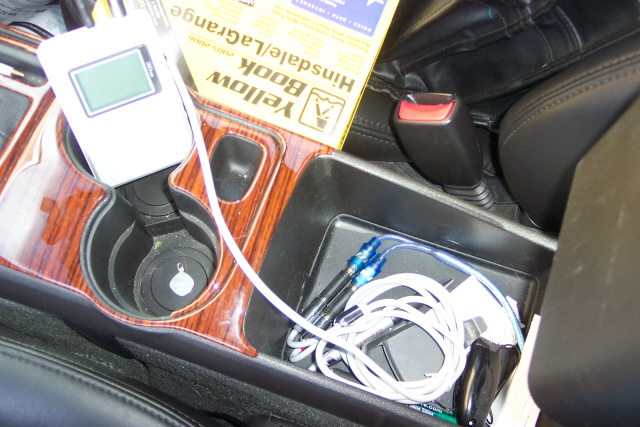
At this point you will want to drill a hole in the console so the rca cables can connect to your mp3 player inside the bottom of the console…
As for hooking up the cleansweep speaker wire connection, I will post a schematic when I receive one from JL for both the Bose and NonBose systems…..Where I have things mounted is where I did it and you may find a better place or a different place to mount everything…..Goodluck and don’t hesitate to ask me for Flip420 (on the cadillacforums.com board) pm me and I will give you my phone number
|