
|
This information is provided as guidance Only. Use this information at your own risk! This site is not affiliated with General Motors or Cadillac. All trademarks are property of their respective owners. |
 |
|
This information is provided as guidance Only. Use this information at your own risk! This site is not affiliated with General Motors or Cadillac. All trademarks are property of their respective owners. |
|
Installation Instructions for CTS with XM tuner Nucleus X2i with NC-GM32T-HarnessThanks to SchamboDownload Full PDF:nucleus-installation.pdf Remove Rear Deck LidThe key is the little Air Bag label in the middle of the pillar cover. Carefully pry it off. I broke the tangs on one.
There is a hex screw underneath the Air bag tab (7 mm). I recommend that you use a nut driver (7mm). Don’t
worry if you drop the nut as there is a little tray to catch it before it falls into the depths of the car. If you look at
the pix of the white airbag you will see the hex screw in place.
Remove the screw and the pillar covers come off. (they also have some clips at the bottom). 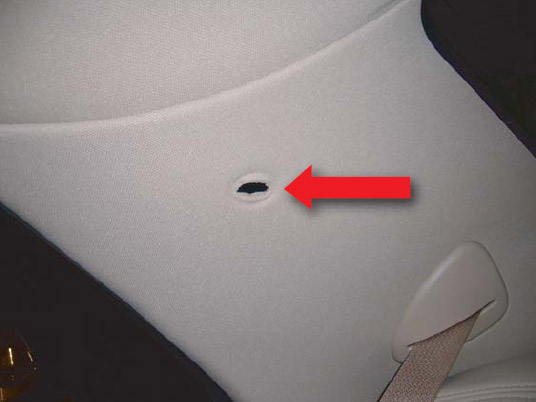
The deck cover has tabs that stick out in the back to hold it down. Behind the seat is a steel brace. Take off the 4 nuts that secure it (10 mm box wrench). The seat back will come far enough forward for you to get at 2 black push pins at the extreme end (right and left) of the top of the seat. Pop them out. (these are very similar to door panel holds, they are barbed and just come loose when you pull on them. There is a tool that will make this easy- shops use them on door panels) 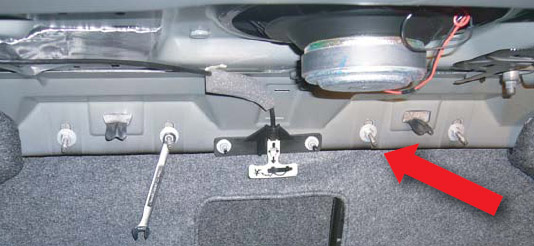
Lace the seatbelt thru the hole and disconnect from the buckle first. (I did not do this and laid it on the side) Really not much too it. Lift the deck cover up and out The seat doesn’t have to come out. Additional note: there are white plastic tabs about 4 inches long 2 inches wide that attach to the rear deck and make the side pillars align correctly. These fell off when I pulled the deck panel off. To re-attach, just clip them to the rear deck before you place it back in (they hold themselves on. The plastic aligns with the widest piece of plastic on the part aiming TOWARD the window. 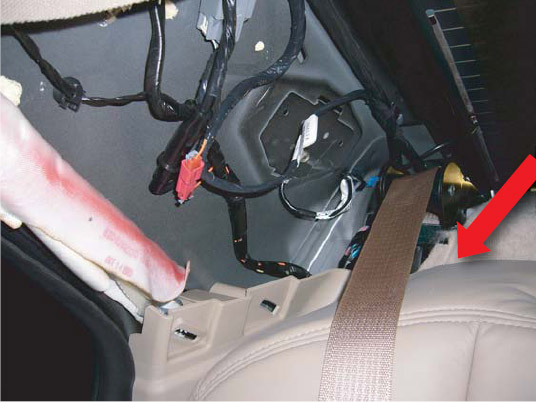
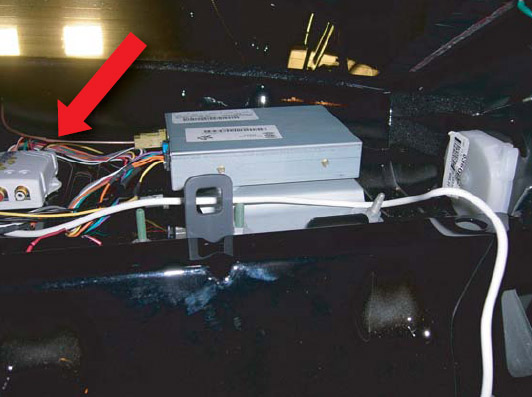
Tip: I had a hard time removing the deck lid. Mine was stuck to the window. Rock it back and forth, then give it a yank. It should lift out then. Locate XM Tuner (Driver side)There are only two connections on the tuner. Remove the bigger connector by pulling out the colored tab and yanking on the connector. Insert the connector to the T-Harness and plug it back into the tuner. Then you should plug the one row connector into the Nucleus box. 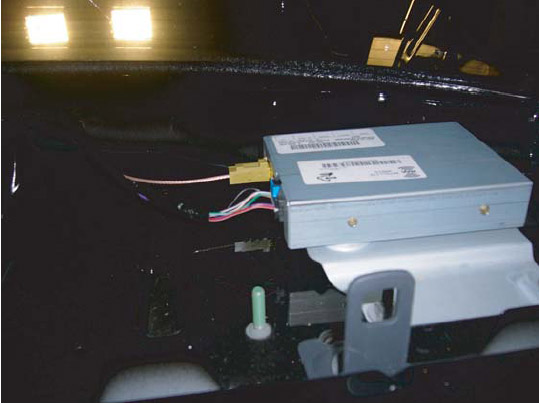

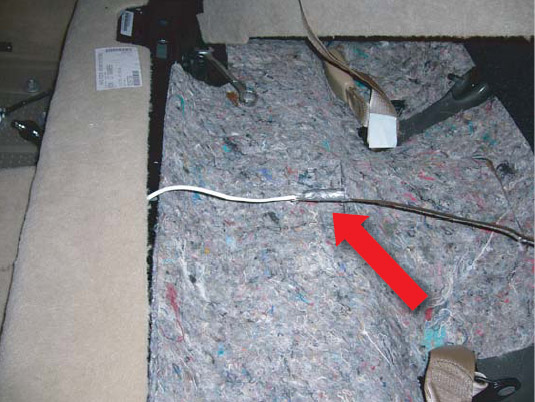
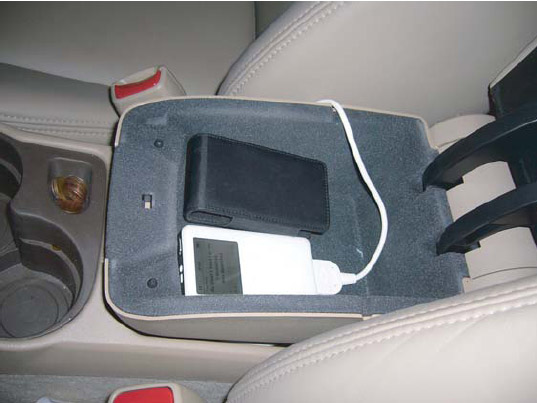
Run Ipod CableAt this point you should run the Ipod connector cable. It is only 8 feet and is not long enough to run up the side. For best results, you must run this cable up the middle to the center console. Start by moving both front seats forward. There are 2 caps on each side of the console. Pop them off with a screwdriver and you will see some bolts. Remove all 4 bolts and you can now lift up on the back of the center console. Next, remove the bottom part of the rear seat. Push down and back on the front part of it and the cushion will lift right out. Now you must snake the wire under the carpet to the console. I used a wire snake but a metal coat hanger would also work. Attach the ipod connector on the cable to the wire with some good tape. Start from the back and push the wire under the carpet to the opening around the console. (Tip: Try to prop the console up with something so you don’t have to hold it up. This way you will have both hands to work the wire.)This is the hardest part of the install and might take a few tries. Once you get it through pull the slack out and leave yourself enough room to place the Ipod in the top part on the console. (Tip: After you hook up the cable to the Nucleus, put the Seat back on and then finish adjusting the length of the cable.) 
Plug cable into Nucleus and Finish installTry to run the cable up the side behind the seat. I removed the back seat but I think it can be done without doing this. Attach cable to Nucleus box. Then secure box to the deck. I used 3M double sided tape and positioned it between the sub and tuner. Also, make sure you tape down some of the connectors and cable of the T-Harness. This way it won’t rattle when the sub is at high volumes. Now your ready to test it out before you put the rear deck lid back on. The install should take about 1 to 2 hours. When you first turn on the car, make sure you let the Nucleus initialize. This will take about a minute or so, then it will appear on your head unit as “NUCLEUS”. This is Manual mode which is the default. Press F6 then F4 and it will go into Advanced mode. Now you should see the song title scrolling on your screen. Now your ready to go. Enjoy. 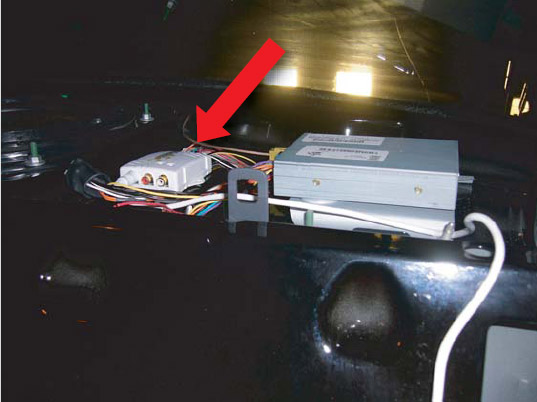
 Manual Mode: 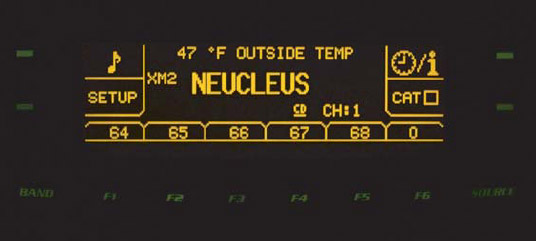 Advanced Mode: 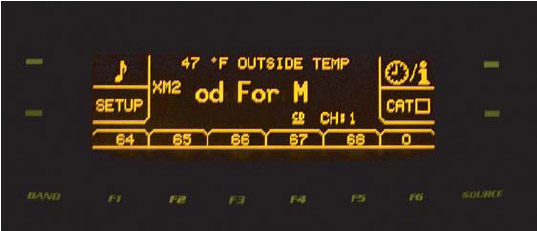 |