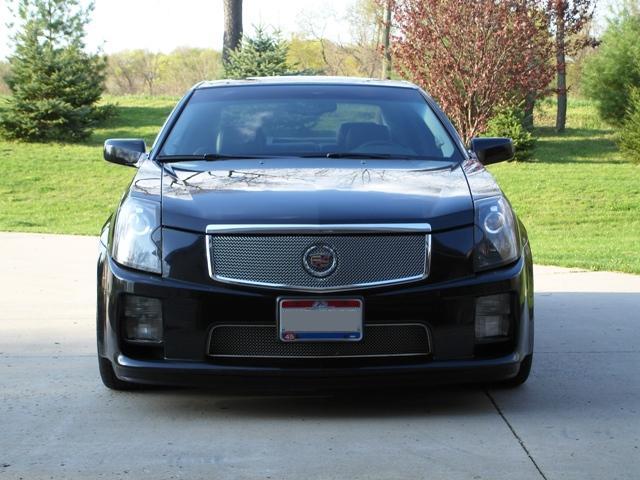
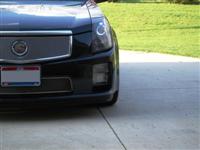
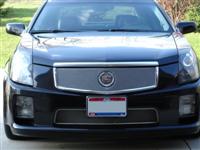
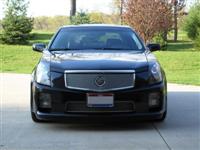
STS-V fog installation in the CTS-V (to remove the yellow)
Thanks to Dubbed Stealth
Click the images to make them larger, more images coming soon....
Part numbers: 10397645, 10385986
Installation is pretty straight forward:
1. Remove 1/3 of the rubber piece that hangs on the bottom of the bumper cover (maybe 4 clips)
2. From the plastic center shield under the engine - remove two clips closest to the side of the car you're working on (front and back, outside edge).
3. Remove fender inner shield (maybe 8 clips holding this on - 2 above the wheel, two under the car, four just inside outer edge of wheel well).
4. Unplug light harness.
5. Remove three 7mm hex head screws that hold the brake duct/drl assembly in place (2 under the bottom of the bumper, one in the outside top corner of the drl opening.
6. Remove duct/drl assembly from car.
7. Remove amber drl fixture from CTS-V brake duct assembly (remove two side clips then slide fixture backwards out of pressure clip on bottom).
8. Remove clear drl fixture from STS-V brake duct assembly and install it in the CTS-V brake duct assembly (unfortunately you can't swap the entire duct/light fixture assembly as the molded mounting brackets on the STS-V duct assembly are about .75" longer than the CTS-V's, otherwise, the entire thing is exactly the same as ours.)
9. Installation is the opposite of removal. Don't forget to reuse the old gasket between the light fixture and the bumper opening, and remember to put the tailpiece back on your brake duct before you reinstall the inner fender shield.
10. Repeat steps 1-9 on the other side of the car.
11. Sit back and admire your work.
|